
When choosing pipes, many of us focus only on pipe size. But we often ignore wall thickness. Remember, pipe wall thickness matters. It affects not only flow rate but also pressure. So when you are specifically choosing Schedule 10 pipes, the question is: how thick is a Schedule 10 pipe?
The interesting thing is that not every Schedule 10 pipe has the same thickness. A small pipe and a large pipe can have different wall thicknesses, even when they belong to the same schedule. If all this confuses you, don’t worry! In this guide, I will discuss Schedule 10 wall thickness and its wall thickness chart. So let’s get started.
Che cos'è il tubo Schedule 10?
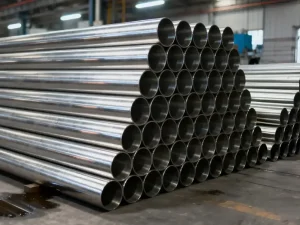
Schedule 10 pipe is a type of pipe with relatively thin walls compared with pipes of heavier schedules. In a piping system, “schedule” indicates the wall thickness for a particular pipe size. Wall thickness varies by pipe size. That means not every Schedule 10 pipe is the same thickness.
Basically, schedule is a standard way to show pipe thickness. A lower schedule usually means a thinner wall. However, a higher schedule usually means a thicker wall for the same pipe size. But remember, not all Schedule 10 pipes have the same wall thickness. The final thickness changes with pipe size. This means that for the right thickness, pipe size also matters.
For example, a 2-inch Schedule 10 pipe has a wall thickness of 0.109 inches (2.77 mm). At the same time, a 6-inch pipe has a thickness of 0.134 inches (3.40 mm). You can see that both have the same schedule number, but their thickness changes with the size. Generally, schedule 10 pipes come with a thinner wall thickness. Their thinner walls make them lighter and leave more room inside for fluid to flow.
How Thick Is Schedule 10 Pipe?
Schedule 10 pipe doesn’t have a single fixed wall thickness. These pipes come in thin-walled varieties. The exact thickness depends on the pipe size. For common steel pipe sizes, the wall thickness ranges from about 0.083 inches (2.11 mm) for a 1/2-inch pipe to 0.180 inches (4.57 mm) for a 12-inch pipe.
This means you first need to identify the pipe size to choose the right thickness. But why does thickness change as pipe size changes? The answer lies in the pipe dimensions. As you know, each pipe has its own dimensions, like size. For example, a smaller pipe will have a thinner wall than a larger one, even if both are Schedule 10.
The Schedule 10 Wall Thickness Chart
Schedule 10 pipe comes in different nominal sizes, and each size has its own wall thickness. To make things easier, here is the Schedule 10 wall thickness chart. It shows the nominal pipe size, outside diameter, wall thickness in inches and mm, and approximate inside diameter.
Find your required pipe size in the first column, then check its wall thickness. Remember, these are nominal sizes for steel pipes. Actual measurements vary with manufacturing tolerances. That’s why you should check the pipe standard and tubi in acciaio inox supplier’s specifications before ordering.
|
Nominal Pipe Size
|
Outside Diameter (in)
|
Wall Thickness (in)
|
Wall Thickness (mm)
|
Inside Diameter (in)
|
| 1/2 inch | 0.840 | 0.083 | 2.11 | 0.674 |
| 3/4 inch | 1.050 | 0.083 | 2.11 | 0.884 |
| 1 inch | 1.315 | 0.109 | 2.77 | 1.097 |
| 1-1/4 inches | 1.660 | 0.109 | 2.77 | 1.442 |
| 1-1/2 inches | 1.900 | 0.109 | 2.77 | 1.682 |
| 2 inches | 2.375 | 0.109 | 2.77 | 2.157 |
| 2-1/2 inches | 2.875 | 0.120 | 3.05 | 2.635 |
| 3 inches | 3.500 | 0.120 | 3.05 | 3.260 |
| 4 inches | 4.500 | 0.120 | 3.05 | 4.260 |
| 6 inches | 6.625 | 0.134 | 3.40 | 6.357 |
| 8 inches | 8.625 | 0.148 | 3.76 | 8.329 |
| 10 inches | 10.750 | 0.165 | 4.19 | 10.420 |
| 12 inches | 12.750 | 0.180 | 4.57 | 12.390 |
How to Read the Schedule 10 Pipe Wall Thickness Chart
Now you can see a Schedule 10 pipe wall thickness chart. It might seem confusing to beginners because of the many measurements. But each one of those tells you something different about the pipe. If you understand them, the chart becomes easy to read, and you can choose the right wall thickness pipe for your needs.
1- Nominal Pipe Size (NPS)
First is nominal pipe size (NPS). It is the name used to identify a pipe’s size. You will see sizes such as 1/2 inch, 1 inch, 2 inches, and 4 inches in the chart. All these are nominal sizes. These numbers make it easier to find and order the pipe size you need. However, the nominal size is not always the pipe’s actual width. For example, the chart shows that a 2-inch pipe has an outside diameter of 2.375 inches. So, if you need a pipe that is exactly 2 inches wide on the outside, don’t rely on the NPS label alone.
2- Outside Diameter (OD)
The measurement of a pipe from one outer edge straight across to the other is called the outside diameter (OD). It includes both the pipe wall and the empty space inside. This diameter matters when you have to connect the pipe to other pipes or fittings. If you don’t choose the right outside diameter, the pipe will not fit and may leak.
Interestingly, for the same nominal pipe size, the outside diameter stays the same for different schedules. Suppose there is a 2-inch Schedule 10 pipe and a 2-inch Schedule 40 pipe. Both of these have an outside diameter of 2.375 inches. However, their wall thickness differs.
3- Wall Thickness
Wall thickness refers to the thickness of the pipe material between its inner and outer surfaces. This is the main measurement to check when you want to know how thick a Schedule 10 pipe is. Look at a 2-inch Schedule 10 pipe. Its wall thickness is 0.109 inches, or about 2.77 mm. Right? This wall thickness comes in thinner ones. That means there is less material between the inner and outer surfaces.
However, a thicker wall means more material. This material affects the pipe’s internal space. A thinner wall means more space, which allows more fluid to pass, and vice versa. This often affects the pipe’s weight and its ability to handle pressure. But wall thickness isn’t the only factor that determines pressure-handling ability. The pipe material, temperature, and design requirements also matter.
4- Inside Diameter (ID)
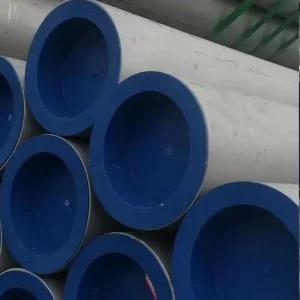
The inside diameter is the width of the open space inside the Schedule 10 pipe. This space is crucial because materials flow through it. They need enough space, which is determined by the ID. A larger inside diameter allows more flow space, and vice versa. Calculating this diameter is very easy. You can approximate the inside diameter by subtracting twice the wall thickness from the outside diameter. Suppose a 2-inch Schedule 10 pipe has an outside diameter of 2.375 inches and a wall thickness of 0.109 inches. Now the formula is as follows:
Inside Diameter = Outside Diameter − (2 × Wall Thickness)
Inside Diameter = 2.375 − (2 × 0.109) = 2.157 inches
Remember, this formula is based on nominal sizes only. That’s why actual measurements may vary slightly.
What Should You Consider Before Choosing a Schedule 10 Pipe?
When choosing a schedule 10 pipe, you might think size is all you need. Right? But that’s wrong. Size alone cannot help you choose the right Schedule 10 pipe. You also need to consider many other factors, like where and how it will be used. If you are confused, don’t worry! Here are the key things to keep in mind when choosing a Schedule 10 pipe.
1- Operating Pressure & Temperature
First, consider the pressure inside the pipe and the temperature of the fluid passing through it. These two things can affect how well the pipe performs. A pipe carrying cool water under low pressure has different needs than one carrying hot liquid under high pressure. As I said above, Schedule 10 pipes have relatively thin walls. So make sure the thickness suits the job. For this, check its pressure limits at the expected operating temperature.
2- Pipe Material
Not all Schedule 10 pipes are made from the same material. So the second thing you should think about is what materials you need. Some pipes are made from carbon steel, while others use stainless steel. Each has its own uses, strengths, and weaknesses. Stainless steel pipe is often preferred when rust and corrosion are a concern. Similarly, carbon steel pipes work well in general low-pressure conditions. So ensure where the pipe will be installed and what it needs to carry. Then choose the material that matches these needs.
3- Corrosion & Wear Consideration
A pipe does not stay in the same condition after years of use. Water, chemicals, and moisture slowly damage its surface. This is known as corrosion. In some systems, moving materials also wear away the pipe’s inside over time. In Schedule 10 pipes, wear means the inside material is lost, which reduces thickness. This will greatly affect safety. So if you choose these pipes for demanding conditions, make sure they are corrosion-resistant and durable.
4- Applicable Standards & Manufacturing Tolerances
Lastly, when buying a pipe, do not rely only on the size written on the product label. Check the required pipe standard. Then, make sure the wall thickness, outside diameter, and material match your project. Also know that the thickness listed in a chart is a standard nominal measurement. The actual wall may be slightly thicker or thinner because manufacturing rules allow some variation. This allowed difference is called a manufacturing tolerance. If your pipe must connect to a flangia in acciaio inox or elbow, don’t ignore these tolerances.

Conclusione
Schedule 10 pipes are very common in many applications. But their thickness can be confusing. In this guide, I discussed a chart showing relative thickness by size. It lets you find the measurements you need without guessing. Generally, a Schedule 10 pipe has a thin wall. This wall thickness is important because it affects fluid pressure. But remember, thickness isn’t the only factor. You also need to consider the pipe material, pressure, temperature, and where it will be used.